Saturday, 27 May 2017

Oops

My most recent print died partway through when the red filament tangled itself:


Ok, that's somewhat annoying. I'm not sure if it came this way or if taking the filament in and out of the extruder has caused this. I should look at ways to prevent this from happening, in any case

Fixing it is easy - just snip the filament and untangle it. *Snip* *Swoosh* *Clang* Oh, wait, the filament was the only thing holding up the X axis and extruder, and it just fell down onto the bed, with predictably disastrous consequences:

It's at least a pretty pattern

This might be my chance to switch out for an aluminium bed. That should also make it easy to mount it using the corner bolts instead of clips. Still, whoops.

Wednesday, 24 May 2017

Lots of printing, now also with PETG

With proper X axis tension, the printer is happily printing. I left it run for hours while we were away for the Street Food Festival, and it was still running merrily when we came back.

This particular print was designed this morning to match our balcony bench's feet, so it can stand up more straight on the slanted balcony. I didn't incorporate the angle of the bench's feed, so it might not work well in the long run, but it works for now, and I don't want to do another print of that length without good reason.

I suspect the reason for the Z offset changes has less to do with the frame expanding and more with just the holders getting push a tiny bit up every print, more if the print warps. The offset is always increasing and then gets reset when I fiddle with it. If it was the temperature/humidity/pressure, it would be going more up and down. So I should try gently bonking down the two Z axis mounts to check if that keeps the calibration.

After my failure with the AA battery dispenser extension, I filed a bug against Slic3r - originally for failing to slice right, but it turned out the model was just broken. I changed the bug to suggest doing a better error message - "auto-repaired" sounds like it actually works, "attempted repaired" would be better. The discussion around this pointed me at netfabb.com/service, which offers repairing STLs for free. With that, the dispenser actually printed right:


I printed a little mount thing for putting up my name sign at work. Unfortunately, I'm not exactly sure where the name sign is.

I started printing a solder fume extractor, but it ate a lot more filament than I expected, I had to stop halfway through when my white filament ran out. Now I have a useless white thing.


This was also the largest rectangular thing I printed so far, at 13x13 cm, so I was extra careful to keep an eye on the clips on the side. The duct fan mount is just high enough that it doesn't hit the clips here. Oddly, the print wasn't really on the center of the bed, but towards the back:


I had a sample of PETG lying around from an earlier order from dasfilament.de. Since my white ran out. I figured it'd be a good time to try that. I did a Bugz because it's small and I had problems with it sticking together in PLA.

When that came out well (and was able to move), I did a McBenchy, of course, which came with a much better bow and almost-readable letters, but dangling filament atop the windows:

Nice overall, but some sagging at the window

Look at that nice, smooth bow

Still some gaps in the foredeck

Stringing in several places - I suspect more retraction would be needed.

The name can almost be read. But what's with the hole in the bottom left?

On a second partial print with higher start position, you can almost read the undertext.

Unfortunately, the Rubinrot (RAL 3003) offered is not quite the shade of red we want in the kitchen, we want Kirschrot. And the filament that they call Kirschrot is misdescribed as Rubinrot, so not I don't really know what it is.

One problem with PETG is that it doesn't print into thin air as easily. Not only does it sag in horizontal prints, unless PLA which can actually print straight across nothing, but it also requires support at a much higher overhang angle. An attempt involving a halfcircle fell down despite support material at an overhang of 40 degrees.


I'm starting up my balcony garden, now that it's nice weather again, and I want to use the two semi-spherical plant boxes I have, However, they don't come with a good holder, nor a good hole to stick a holder through. So rather than drilling a little hole, I of course design a matching holder:


I believe the PETG would be the appropriate material for this, having better structural integrity as well as probably being able to withstand the weather better. I should probably print it sideways to not put the stress on the layers, but across them, and to avoid the overhang problem above.

An advantage of using Octoprint is that I can go back and see what I have printed, hence the many things listed this time.

Thursday, 4 May 2017

The Re-Birth of a Z Probe Mount, and a Discovery About Tension

Z offset Tuesday morning: 1.0. Air pressure 1017hPa. Humidity 26%
Z offset Tuesday evening: 1.1. Air pressure 1016 hPa. Humidity 30%.

Moving the X axis adjustment block inwards made it impossible for the knob to fit in the hole. V7 of the modded Z probe holder coming up.

Interestingly, two prints of this came out very differently. One had ringing, oblong cylinders, ragged walls, and big gaps in the top. The other was nigh perfect. Given that I had been fiddling with the X axis belt tension between the prints, that rather hints that a lack of tension can cause all of the above.

Bad tension: Top part shifted, top layers have holes, rining on the side, cylinder is oblong

Good tension: So much nice

V7 came out nicely, so I'm printing the full piece. I also took the opportunity to align the bed left-right, figuring my fiddling around might have thrown things out of whack. And indeed, it was quite slanted. After straightening, the Z offset was 0.2! That's pretty extreme, and shows I can't use the Z offsets and humidity/pressure/temperature readings as long as I'm messing with the X axis.

Calibrated the X axis left-right and got totally different Z offset with the same pressure and humidity. I figured if the tension is this important, I should measure it. What better way than to use a guitar tuning app to measure the frequency? First I tuned it to 124 Hz, but when doing the bed calibration the X belt actually came off, so that must have been too much. Going down to 103 Hz doesn't make the belt slip, so that's probably about right. For tuning, I used Guitar Tuner with the phone lying on the bed and using a hex wrench to strum the belt.

The Z probe mount in place. I need to figure out the electronics and software parts before I put in the actual probe.

Printed the Extensible Battery Dispenser in AAA size.

Z offset Wednesday evening: 0.1 Air pressure 1016 hPa. Humidity 30%.

Printed tiny bananas for scale. Photo coming when they have been painted. Also printed banana doorstop, but it should be done in the flexible PLA to actually have traction.

Z offset Thursday morning: 0.1. Air pressure 1016 hPa. Humidity 27.%

Printed AA battery dispenser extension, but it failed since part of it was just... missing:


Monday, 1 May 2017

Printing galore, with minimal problems

With the new bolt in and working well, it's time to get back to the Z probe, and otherwise organize the printer. The Z probe unfortunately is made for the Dibond Mendel90, not the Sturdy. But that merely means that the cylinder for the belt holder is a bit larger. I did a partial print with a 12mm Ø cylinder, and it was a slightly tight fit. At the same time, it's clear that the probe mount will hit the little extra piece I added to allow enough space for the winged nuts on the Wade's. So that will need to be accounted for, too. Might as well remake that in something nice, why not one piece?

The black at the bottom is because I had just changed from the black soft PLA

While getting that designed, I decided it would also be good to get the 'Pi a bit under control. I had printed Nophead's Pi mount that goes on top of the power supply, but it turns out most of my (fairly many) USB connections go elsewhere - camera, humidity sensor, Lilliput, keyboard, mouse. Plus the Nophead design was for the Pi that has two screw holes, mine has four.  So hop onto Thingiverse and find this nice design. Slice, upload, print, altogether slightly over an hour. Cheaper and faster than even Amazon Prime Now could do it, if they even carried such a specialized item. I <3 my printer - though the vibrations on my rather unstable printing surface ironically made the Pi fall off the table mid-print.


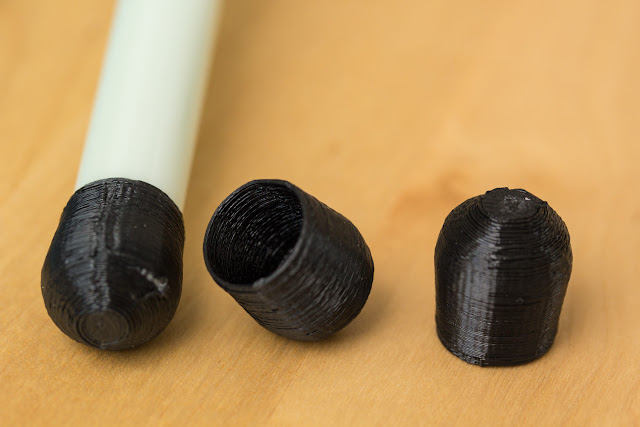
I also printed some more tips for sword cores for my Belegarth group, a good use of my flexible PLA. This was while the printer was expanding due to, I believe by now, pressure changes - my little humidity sensor says the humidity and temperature is nigh constant, but the weather got nicer over the weekend. This led to some of the tips of the first print coming loose, and the entire second print coming off and sticking hilariously to the print head:

I have a mold of my extruder tip now

The poor things never stood a chance

The tips came out nice in a third print, though, and are already being incorporated in my next set of swords.


I did a toothbrush head holder, but didn't think of the fact that Mickey has a stand for hers already. I might design a stand for mine, including my standard toothpaste (without sodium lauryl sulphate, so my teeth get less sensitive and I get fewer canker sores- there's only one that I know of, so I'm not going to change.)


Current Z offset: 0.9mm. Current pressure: 1008 hPa.

I weighed the Pi mount print to 14.3 g (we have a fine scale now for other purposes), and Slic3r says it's 12.66 cm^3 of filament, so the density is 1.13 g/cm^3 - heavier than water, I can double-check that, yes it checks out. With this value, the filament for the battery dispenser costs just over 1 Euro. The printer itself, having previously measured at around 60W while printing (less than various calculations show), will take about 4 hours, so 240Wh, which is currently priced at €0.27/kWh (if I understand this correctly), for a total power usage of €0.06. Even if the extra costs of Pi, monitor, Arduino, and other pieces end up doubling this, I'm still paying much more for the filament than the power.

Designing the probe holder took several tries of increasing precision, each requiring taking off the clamp on the belt and the little extra X axis piece. That's how working on the printer is. Test #4 had an X axis offset at one point (unfortunately right before it would have mattered little) of about 1cm. That's not supposed to happen. It's not the motor overheating, they run nice and cool. It might be a problem with the belt, since I keep loosing and refastening it.